Tuesday, May 27, 2014

A Tale of Three Lenses

P1070996a

Regular readers of this blog might know that I dabble in photography, using a variety of techniques and equipment, among which is a micro-four-thirds format (m4/3) Panasonic Lumix G5 camera.

These are interchangeable-lens cameras that feature a lens mount-to-sensor-distance short enough that, with the proper lens adapter ring, virtually any film camera-era, manual focus lens can be made to work, in addition to the normal m4/3 system autofocus lenses.

Additionally, Olympus, which too makes m4/3-compatible cameras and lenses, also makes what is called a "body cap lens," a simple, inexpensive, fixed-aperture, manual focus lens fitted into a plastic m4/3 body cap.

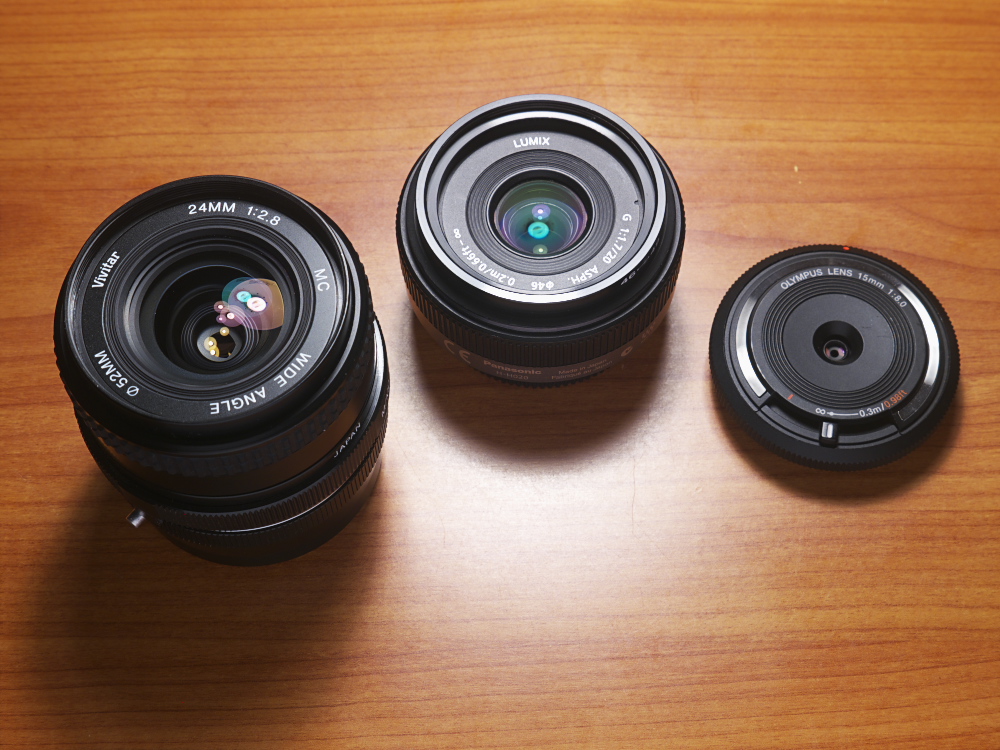
While not purposefully intending to conduct a comparison test between these three families of lenses - system lenses, adapted manual lenses and body cap lenses - as it turns out I've spent the last three days creating images on the G5 using just this lens variety, first on Sunday with the Olympus 15mm, f/8 body cap lens, then on Monday with the Lumix 20mm, f/1.7 autofocus system lens, and finally today with a Vivitar 24mm, f/2.8 film camera lens in Minolta MD mount. I'd like to share with you my subjective experiences, along with a sampling of images.

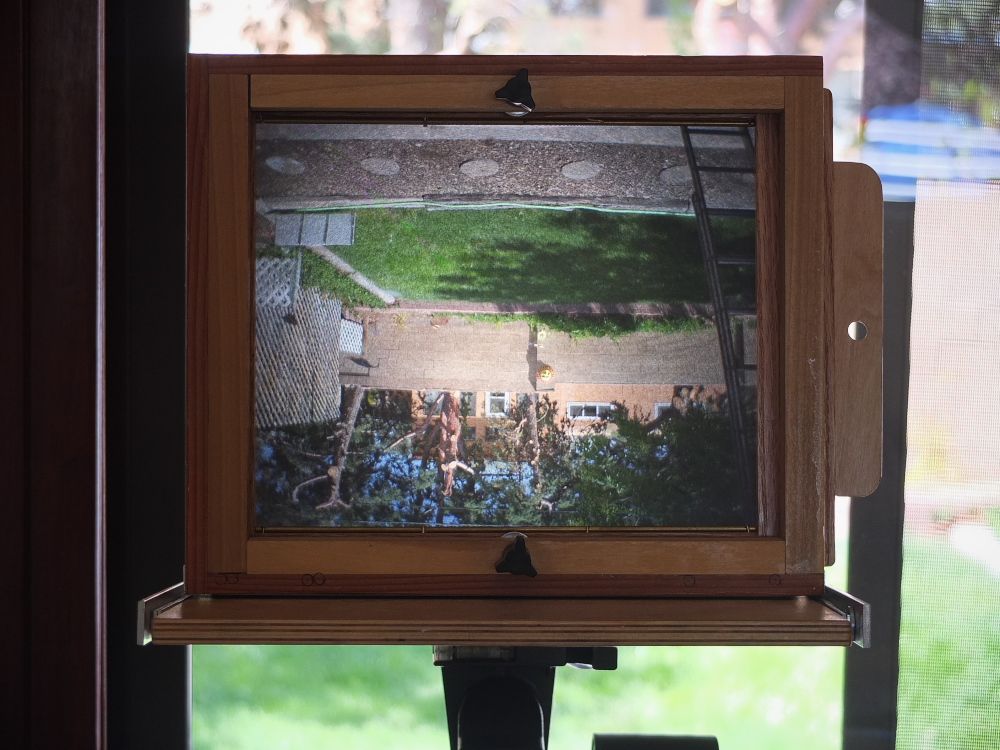
First, a bit about the Lumix G5. It's a 16 megapixel camera that features an electronic viewfinder (or EVF), that permits one to see the live, electronic image from the camera at eye-level, handy for determining composition and focus without the image being washed out in bright sun, as can often happen with rear LCD screens.

For most of these images, I set up the camera to shoot in square format (one of my personal likes), and also to record both raw and JPEG files. I set the camera's film mode to Dynamic Monochrome, meaning that, while recording a full-color raw file, the live scene in the viewfinder is black & white; this being one of my preferred methods of composing images, and something not possible in cameras limited to strictly optical viewfinding.

In post-production back at home, I view and edit the raw files in SilkyPix raw developer software, whereas Windows permits me the opportunity to first view the B & W JPEGs in preview mode, as a way of culling out the keepers from the throwaways. Especially with urban photography, I'll often render the final images in color, even though they were first composed in monochrome.

The Olympus BCL-15 Body Cap Lens: P1070829a

P1070796a

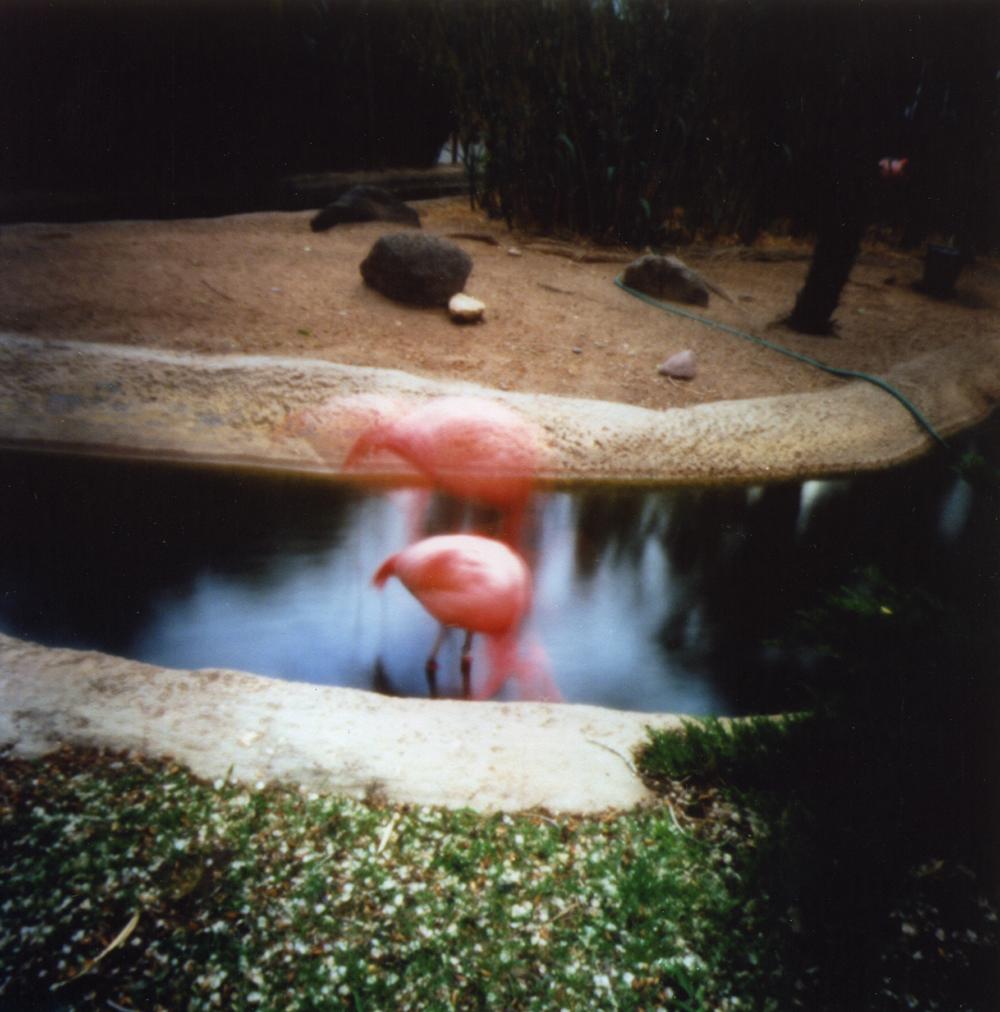
Okay, onto the lenses. First up is the little Olympus BCL-15 body cap lens. These cost around $50, and so one shouldn't expect great optical quality. They are, however, much better than a Holga or Lomo plastic camera lens. Its 30mm equivalent angle-of-view comes with some noticeable barrel distortion and chromatic aberration, both of which I correct for afterwards in SilkyPix using a custom development taste that I apply prior to any other adjustments.

The results are surprisingly good, but not as tack sharp as a better system lens.

The main advantage of this little guy is size, weight and responsiveness. With a preset focus detent at the hyperfocal distance of its fixed f/8 aperture, there's not a bit of focus-induced shutter delay. The camera becomes a speedy little point-and-shoot with this lens (and also noticeably lighter in weight), very responsive to quick-moving situations, since everything from about several feet outward are in adequate focus. When used along with the G5's optional silent electronic shutter mode, this combination makes for a deadly silent, compact and responsive street shooter.

In low light, you'd want to bump up the camera's ISO high enough to prevent motion blur (due to the lens's fixed f/8 aperture), and with that will come some noise, but this can often work out to good advantage in B & W, lending the image a film-like quality.

Along with turning the G5 into a quick and easy point-and-shoot street camera, the BCL-15 helps prolong the camera's battery life, since no power is being consumed running an autofocus system.

The Lumix 20mm-f/1.7 System Lens: P1070896a

P1070877a

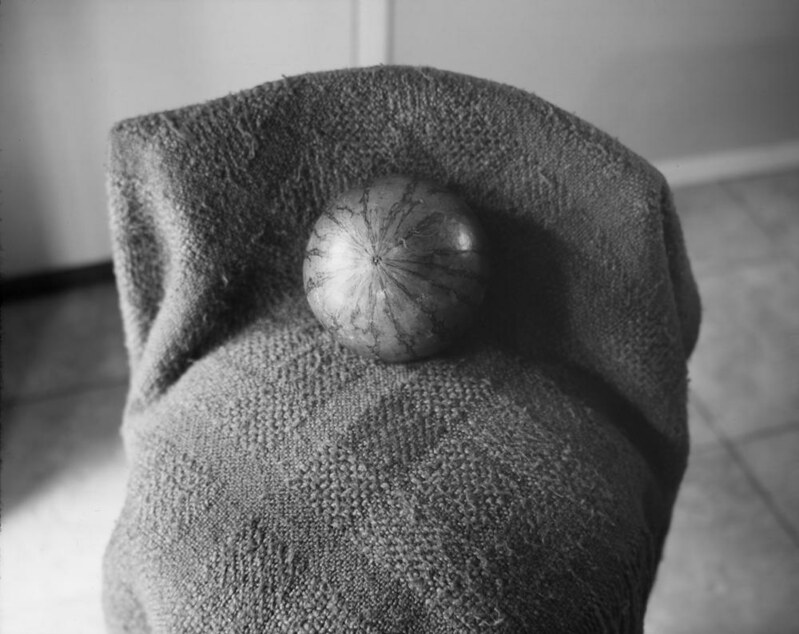
Next up is the Lumix 20mm, f/1.7 system lens. My copy is a 1st generation model, which is known to autofocus a bit slowly, while also making an audible motor sound, something you'd not want to use with video. Its main advantage is the wide-open f/1.7 aperture and its 40mm equivalent angle-of-view, about the same as human vision and a nice compromise between the wider 35mm and narrower 50mm equivalent angles-of-view. It's also a very small lens, just a bit longer than the Olympus 15mm body cap lens, protruding not much further than the camera's hand grip.

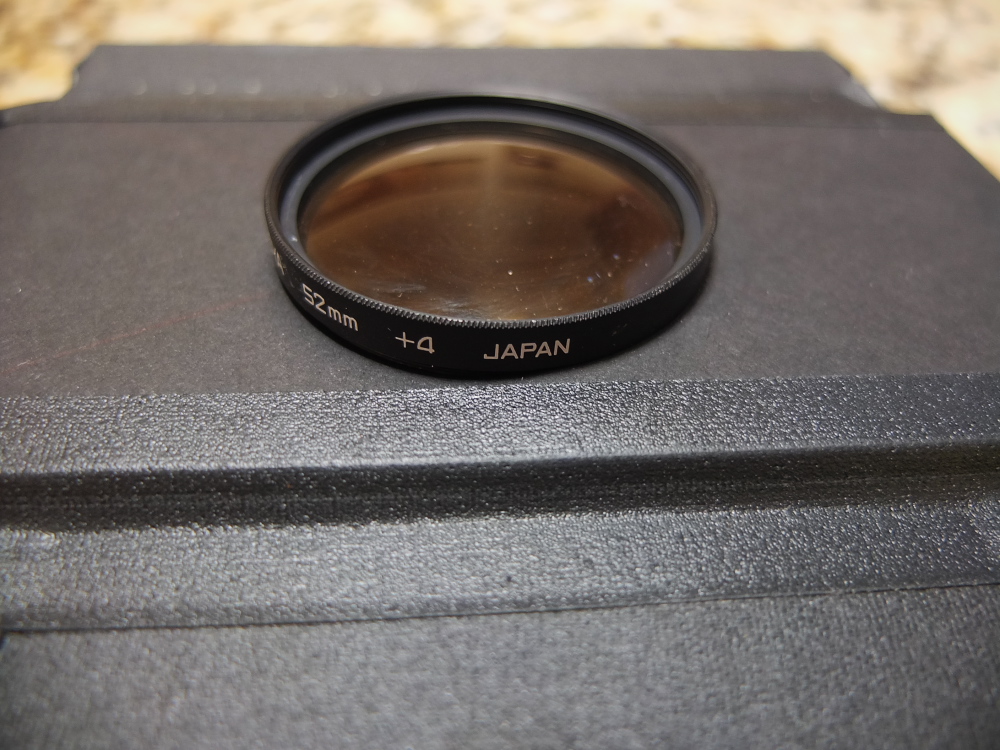
That wide-open aperture doesn't help you achieve shallow depth-of-focus images in bright sun, however, unless you employ an add-on neutral density filter, which helps by cutting down enough light entering the camera to permit wide open, f/1.7 apertures while keeping the shutter speed below the camera's maximum of 1/4000 second.

The images produced by the 20-1.7, especially above f/2.0 apertures, are very sharp, corner-to-corner. Of the three lenses used in this comparison, this one is obviously the sharpest, beaten only by its system lens stablemate, the venerable Lumix 14-45 (though not compared here).

So why not use this lens exclusively? Because it has a habit, in dim or low contrast light, of hunting for focus, even autofocusing in the wrong direction. I suppose I could operate this lens manually with its fly-by-wire focus ring; perhaps another round of testing is in order.

The Vivitar Series 5, 24mm-f/2.8 Minolta MD Lens: P1070974a

P1070962a

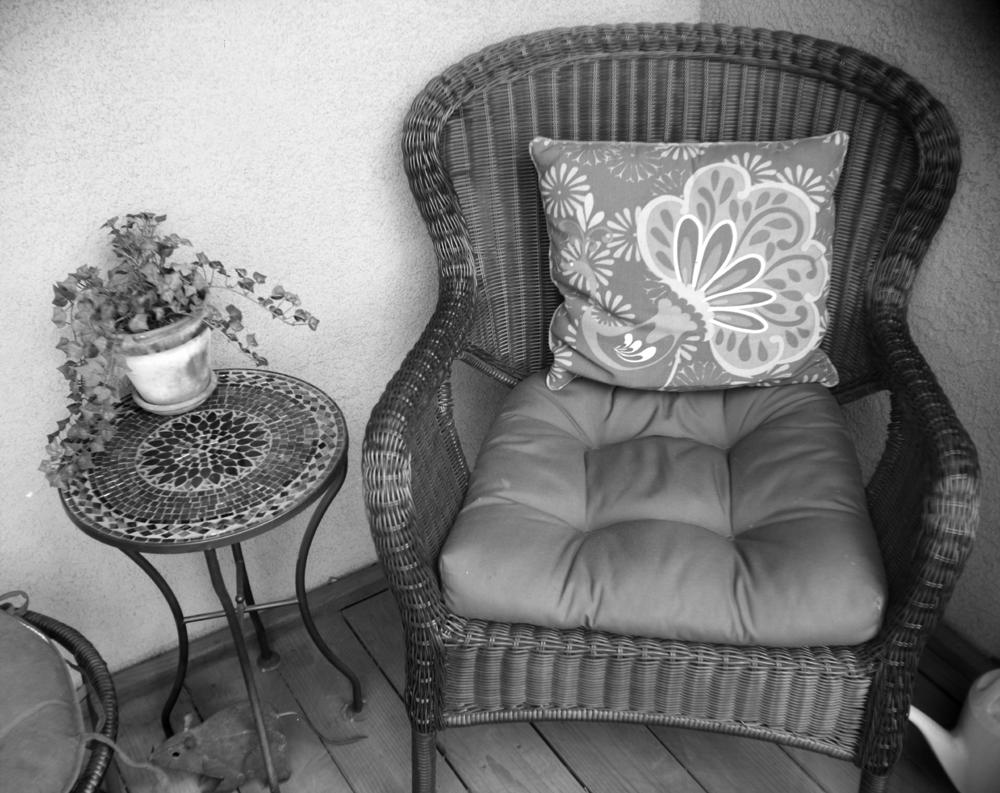
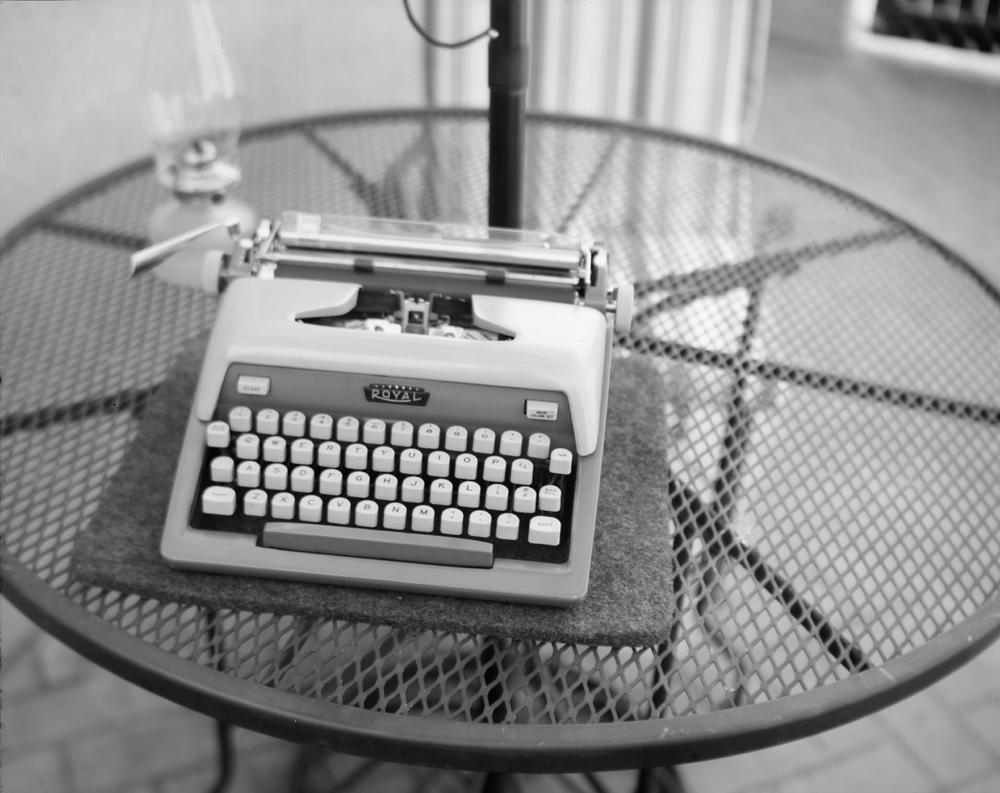
Which brings us to the last lens in our comparison, a film camera-era, manual focus, Vivitar Series 5, 24mm, f/2.8 lens in Minolta MD mount. It's heavy, it has a sexy, rubberized focus ring with a long focus throw and buttery-smooth feel, and a real aperture ring with nicely felt detents that go "click-click-click" as you change the aperture setting.

Shooting with this lens makes you feel like you're back in the 1970s - absent the afro and bell-bottoms - while being able to see that silvery, black & white, live-view image melt in and out of focus as you turn that heavenly smooth focus ring, with Jimmie Hendrix playing lead guitar in the background. It even looks the part.

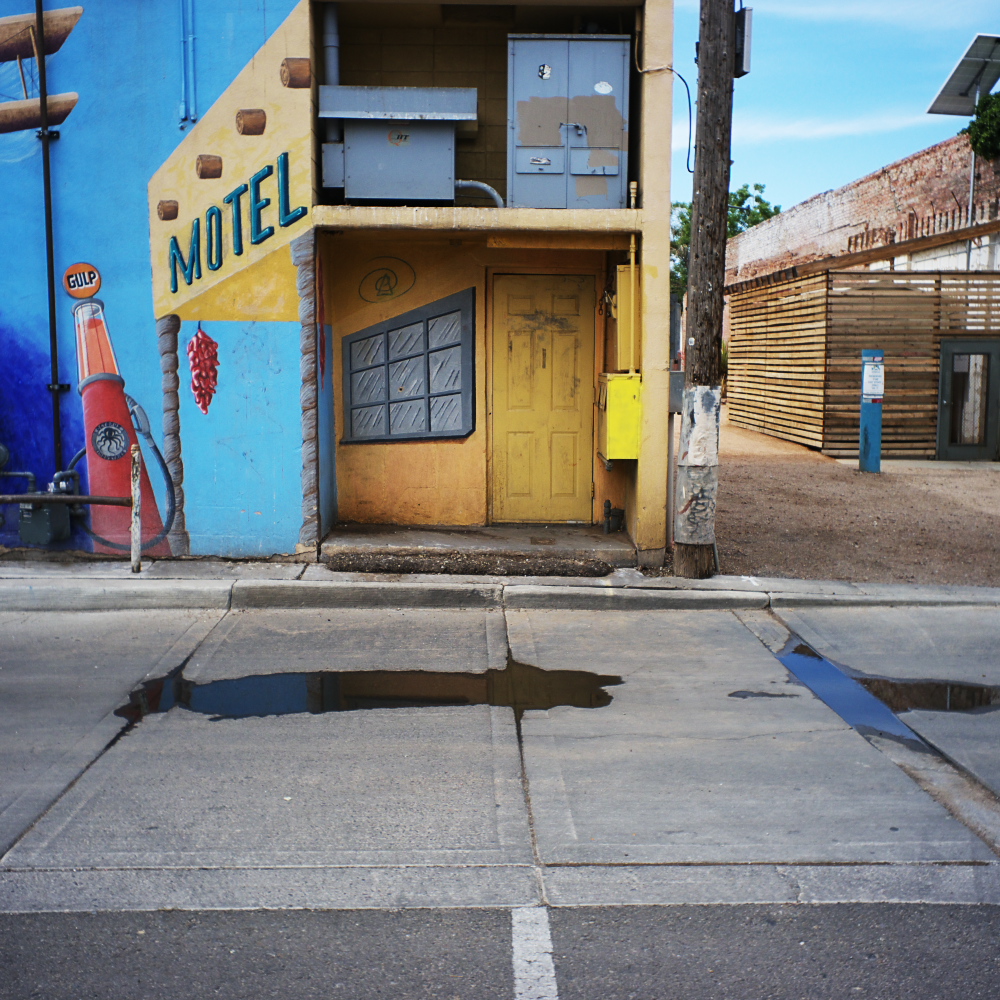
But, snapping out of our ergonomic euphoria for one moment, we notice two things. One, the 48mm equivalent angle-of-view is a bit tight. While this might have been considered "normal" back in the day, I tend to like wider angles. I find myself stepping back when composing with this lens, as I've trained my eye with lenses like the Lumix 20-1.7.

Two, once in a post-production I notice the images, though obviously sharper and with less distortion than the little Olympus body cap lens, aren't up to the same performance level as either of my Lumix autofocus system lenses. This is because these newer lenses are software corrected, in-camera, to compensate for manufacturing and design deficiencies.

You'd have to get expensive glass like Leica or Zeiss to see some improvement over the Lumix lenses, and even then only if they were designed to compensate for the telecentricity demanded by digital sensors.

Conclusion: In the end, I found that I liked all three lenses, each for their own reasons, and found I can't see parting with any of them. Of the three, I suppose I could make do without the little body cap lens, provided I figured out an efficient way to operate the 20mm Lumix lens in lightning-fast, stealthy, street-photographer manual focus mode, since it comes the closest in size and weight.

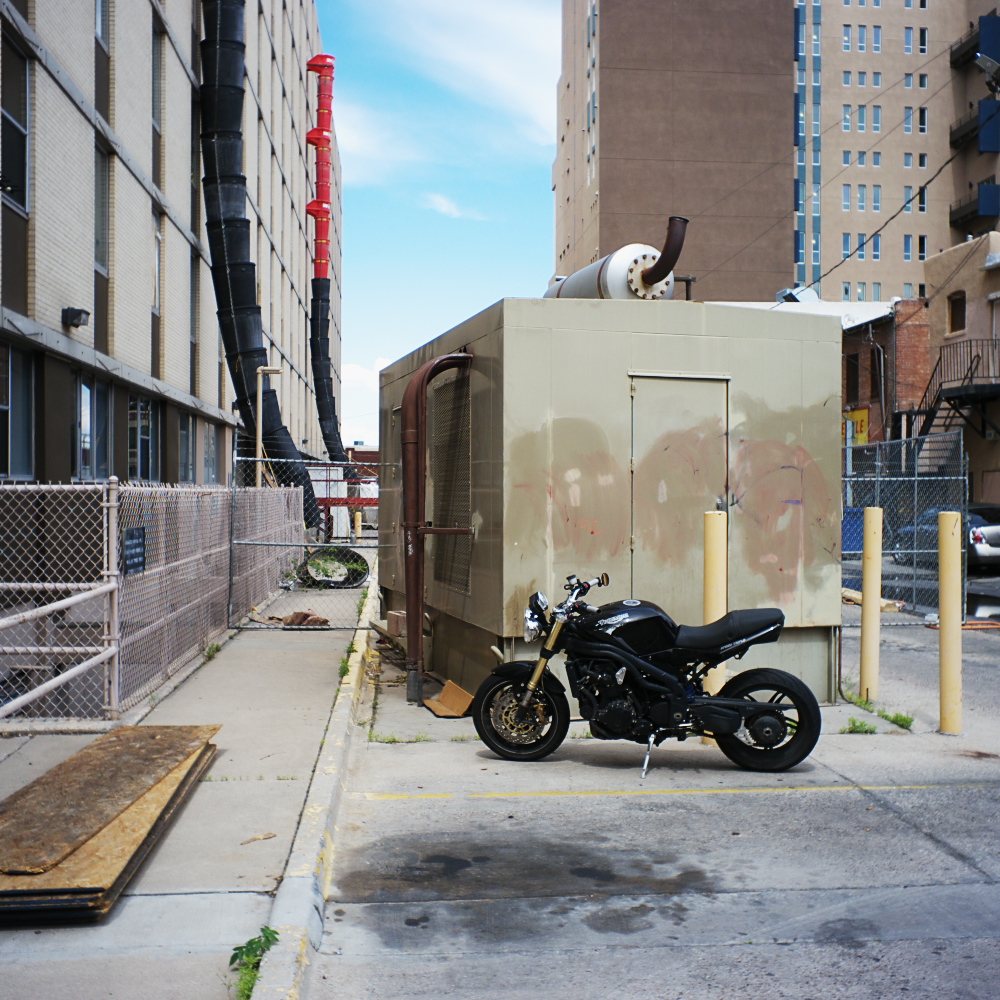
Comparing the sample images from these three lenses, another thing evident is that quality of light, and subject matter, probably have more to do with a successful image than the lens itself. Consider the Olympus body cap images that were shot on a partly hazy morning with almost perfect light, then compare them with the Vivitar film camera lens - a much better piece of glass, to be sure - but shot on a harsh, sunny day near noontime. That cheap little plastic lens sure holds up well, doesn't it? As for the Lumix 20-1.7 images, I had intended from the outset to keep those monochrome, as the dim light and fast-moving subject matter demanded both a fast lens aperture and relatively high ISO. A totally different image aesthetic, but little to do with the particulars of the lens chosen.

I'll close with reflections on the benefits of a live-view, interchangeable lens camera system, like m4/3. Having a nice lens choice is nice. Seeing the live image in monochrome (or any other special effect) is nice. Being able to configure the camera, using various lenses, for specific uses, is nice. Lightweight and compact is nice. Nice is nice. There are other camera systems out there that might promise to do certain things better. But for the best combination of price, weight, size, functionality and flexibility, few things beat this system, as these three widely different and unique lenses demonstrate.

Monday, May 26, 2014

Carlton's Dream Rediscovered

P1070840a

Typecast224

Post-Script: Of course, I misspelled "Clie," Sony's brand name for their now defunct Palm OS-based PDA. You might have noticed in the photo that the keyboard on the Clie looks different from a conventional QWERTY keyboard. This was an alternative design called FITALY, designed to be optimized for single-stylus entry. I got very quick with data entry using this alternative method, which I had learned along with the Palm graffiti method, and used when I didn't have the detachable Sony keyboard. Both skills have now languished in the intervening years since I no longer use a PDA as a writing tool.

The short story "Carlton's Dream" was a fantasy inspired by my reflections from years of perusing the back page advertisements of magazines like Popular Science and Popular Mechanics, of a guy who orders a full-sized rigid airship (i.e. a Zeppelin) from such an ad, and the havoc that results. This is one of the very fun things about writing fiction, that you can create a world where almost anything, no matter how silly or unrealistic, can happen.

Photo via Lumix G5 (with Olympus BCL-15 body cap lens) - I've decided to start using the Lumix micro-4/3 camera a bit more. While it doesn't have as nice of a dynamic range as the Fujifilm X10 without some additional post-production manipulation, its EVF (electronic viewfinder) is much more usable in bright sunlight than the washed out LCD screen of the Fuji camera.

Typecast via Hermes Rocket. I still have some issues with the carriage not advancing when I type fast. My solution today, while typing today with the Hermes upon my lap, was to simply type slower, ensuring the carriage advances after each letter, which I could discern by feel. Surprisingly, this wasn't as ponderous as it might sound, considering I was composing as I was typing and had to pause frequently to work out sentence structures in my head. Slow typing, as it turns out, isn't as slow as it sounds when you make less mistakes as a result!

Sunday, May 25, 2014

Justifiable Reasons

Dad_Egypt001a

Typecast223

Post-Script: Best wishes to all who served, their friends, family and comrades.

Top image of my dad, Chester Van Cleave (right), in Egypt during WWII. He was an aircraft mechanic, working on P-40s and P-41s, assigned to an American fighter squadron attached to General Montgomery's army in North Africa. I only found out, after his death in 2007 and while cleaning out his affairs, that he had been awarded two bronze stars. Which he never bragged about, or even mentioned.

In 1963, with three young boys and a civil service job, his wife passed away. He always remained a hero to me, for his service to our country in the war, and what he did as a father to keep the family together after tragedy struck. The greatest generation, indeed.

Typecast via Hermes Rocket. I did some more work to the new Rocket today, including adding some thin brass tubes as sleeves to four of the linkages that actuate the carriage escapement bar, so that now all of the keys will reliably move the carriage with light finger pressure. This has additionally enhanced the typing feel of the machine so as to be the favorite of my small collection.

Tuesday, May 20, 2014

This Ain't Rocket Surgery

DSCF1760a

Typecast222

Post-Script: The lesson in this newest typewriter acquisition is that sometimes it's best to be patient, you never know what might come your way. I had for a long while desired a well-engineered, mid-20th century ultra-portable typewriter. This one not only fits the bill, but its provenance makes it altogether extra special.

Typecast via Hermes Rocket, photo via Fujifilm X10.

Bonus Images: Here are scans of the owner's manual included with this Hermes Rocket, circa 1953. Click on the images to see them at 800 pixels wide.

Page 1: Rocket001a

Page 2: Rocket002a

Page 3: Rocket003a

Page 4: Rocket004a

Page 5: Rocket005a

Page 6: Rocket006a

Tuesday, May 13, 2014

New Video: Holga Harman Selfies

Holga Harman Selfie

I've been at it again, making small, direct-positive prints in Holga film cameras and then documenting the technique in an instructional video, uploaded to You Tube.


Why do I like doing this? Well, for one, the whole process of exposing and processing silver gelatin paper images as an in-camera film is so fun and rewarding in itself that a person could easily satisfy their creative urges. But recording video with a camera like the micro-4/3 Lumix G5, then editing the production in iMovie on the iPad, is entirely different but equally fun and satisfying. Together, these two creative pastimes are too fun not to share with others.

About the phenomenon of "selfies" - the making of self-portraits - while they might seem overly self-indulgent, they do serve one practical purpose, that being a means for learning the art of portraiture. Many of us dabble with our photographic art in private, and thus using ourselves as subjects becomes a convenient method of pursuing a process of self-instruction toward further creative development.

Top photo via Lumix G5 of a Holga Harman selfie taped down upon glass to dry.

Monday, May 12, 2014

Those Fragile Bits

6.23.2009 014a

Typecast221

Post-Script: Along with all those evaporated digital files are scans of older paper negatives from my more active pinhole camera days. But, of course, those paper negatives are still stored away in 3-ring binders, still physically present, still able to be re-scanned and come alive once again as digital images. Another example of the importance of archiving something in as physically tangible a form as possible.

I also had a number of written works go missing, some of which were novel-length and still unfinished. Fortunately, I had made a copy of some onto a thumbdrive, and hence was able to retrieve them, while my earlier short stories seem to be permanently gone.

Photo via Lumix G1 from sometime in 2009 along Interstate 40 in eastern Arizona; typecast via Royal Futura 800.

Tuesday, May 06, 2014

Pink Flamingos

WPPD003a

Typecast220

Post-Script: My visit to the Rio Grande Zoo was on the last Sunday in April, when Worldwide Pinhole Photography Day is observed. I brought with me, besides the 4x5 box camera and paper negatives, a Holga 120 pinhole camera with Kodak Ektar 100 color film. I also had a good time meeting and photographing with artist Becky Ramotowski and her husband Shane.

I do have mixed feelings about shooting color medium format film in pinhole cameras. While the results from a quality glass-lens camera with medium format can be spectacular, these images from the Holga 120 pinhole lack any additional sense of quality over what one might expect with 35mm film in a pinhole camera, where the sense of granularity in the emulsion sometimes works well with the softness of the image. Here, using the larger 120 format film, there's just softness absent any crunch of grain. The additional cost of processing and printing, for only twelve images, makes the process seem excessively expensive. I'm going to have to consider making, converting or buying a 35mm format pinhole camera, just to experiment with further.

Photo via Holga 120 pinhole camera and Kodak Ektar 100 film, typecast via Royal Futura 800.

Monday, May 05, 2014

You Never Know, Part II

Chair001a

Today, Monday morning, I had an opportunity to try out several test exposures with my eight-by-ten-inch tailboard camera fitted with the newly acquired 250mm meniscus lens, referenced in this blog's previous entry. As is my usual habit, I used Freestyle Photo's Arista brand grade 2 resin coated black & white print paper, pre-flashed to tame excess contrast. The top image used a 9mm aperture, with the box drawn out to 296mm focus, for an f/33 focal ratio, requiring a 7 second exposure.

Royal_Futura001a

This next image used a 17mm aperture and was focused to 333mm, making for an f/19.5 focal ratio, requiring about a 1.5 second exposure. Due to such a short exposure time, and the nature of using a hand-operated shutter, the resulting paper negative was exposed rather nicely. In this second image, it appears that I missed focusing sharply on the Royal typewriter's nameplate, instead focusing a bit short, at the front edge of the patio table. I should have used a smaller aperture, which would have both widened the depth-of-focus and lengthened the exposure time sufficiently for more accurate timing.

Meanwhile, in the first image, there's a bit of darkening in the upper right corner that's absent in the second image. I don't think the aperture stops are vignetting the image; most likely I got in the way of the picture, as I was standing to the camera's right during the exposure and could have inadvertently cut off the corner with the dark slide being held in my hand; this new lens is a bit wider in viewing angle than what I'm used to working with. But it's something worth keeping note of for future shots.

I've taken this massive box camera and heavy tripod out in the field on previous occasions, along with a backpack filled with heavy sheet film holders and accessories. It's a lot to carry, especially by one's self, with the bulky camera under one arm and the tripod over the other shoulder, leaving no free hand available with which to steady one's self should the footing become treacherous. Really, I should think more seriously about building a bellows version of this camera, which would hopefully be both more compact and lighter in weight. As it is, this tailboard camera is more fitting for studio portraits.

~Joe
Update: I took the camera back to the workshop and recentered the lens bracket with the aperture stops, hopefully eliminating the off-center vignette. Another test image afterwards, that I'm particularly fond of.

Mellon001a

Sunday, May 04, 2014

You Never Know

DSCF1655a

You never know what you might find, that's been my experience. This was the case when a coworker, who had been ridding her house of clutter in preparation for a move, found a bag of camera gear and gifted them to me.

I had expected the usual antiquated film camera with a less than premiere assortment of lenses, and some outdated or redundant darkroom equipment, and I was not disappointed in that regard. In the bag I found a Canon AE-1, which needs a special battery in order to find out if the electronics are functional (the usual culprit being a dead IC chip) and a Sears-branded lens, along with some filters, a development tank and some outdated printing paper.

The paper might prove to be useful as in-camera paper negatives, while the development tank is entirely redundant, worthy of reselling via Craig's List or eBay. There was also a mercury darkroom thermometer, accurate but slow to respond, more useful for calibrating my dial-indicating thermometers than for actual darkroom use.

I was about ready to dismiss this entire bag of potential photographic treasure as merely worthy of the flea market when, rummaging through the bottom of the bag, I came across what at first looked like a lens filter, but proved to be the most promising item in the entire selection of gear, a +4 diopter close-up lens. This is a single-element, coated glass meniscus lens mounted in a threaded filter ring. Why is this such a promising find? Because it has a focal length of around 10 inches, and can project a coherent image large enough to encompass an eight-by-ten-inch film plane.

DSCF1660a

What on first appearances looked like just another miscellaneous filter now promises to be a large format camera lens, once properly mounted in a box camera, of which I have a particular handmade tailboard box camera just waiting to receive the new lens.

In its day, the Canon AE-1 was a top-of-the-line, consumer-grade film SLR. Millions of them were sold, and it's not uncommon for almost everyone to have known a relative in their family who had one. As cameras go, they're a fine film camera, but I don't have a selection of Canon-mount lenses in my collection, nor do I wish to start collecting them. There's also the problem that the electronics on these cameras are known to give out, decades afterwards. I'll have to bring this one down to the camera repair shop and see if it's still functional.

I'm also not willing to shoot much more 35mm film, as I've determined, despite the fact that I have a small collection of various types and models in good working condition, I'd rather spend my money on film, processing and prints of medium format, where there's a much greater bang for one's buck.

However, there's this other aspect of finding used photographic gear, which is to repurpose it for some more interesting usage mode. In this case, redeploying a magnifying close-up lens as a large-format camera lens is just up my alley. Meniscus lenses were the very first type of lens to be employed in the earliest cameras. They are defined as being a single lens element with one side concave and the other convex. In use, the concave side is positioned in the camera pointing toward the subject, and aperture stops are positioned a certain distance in front of the lens.

The result of creating images with meniscus lenses can be very representative of the earliest days of photography, especially when combined with orthochromatic paper negatives that render the subject in that distinctive 19th century tonal pallet.

This Sunday afternoon, I made a foamcore board adapter plate and mounted the meniscus lens into my eight-by-ten-inch tailboard camera. The lens is recessed a bit behind the front aperture plate slot, which positions the lens almost ideally for the camera to achieve infinity focus with the two halves of the box camera nested as close together as possible, and without any vignetting from the aperture stops; almost as if this box and that lens were intended for each other. I will take this as a good sign of things to come, image-wise.

As a test of the closest focusing distance for this lens & camera combination, with the rear box-half slid all the way rearward on the tailboard, a close focus distance of 30 inches was measured, close enough for portraits or still-life compositions.

DSCF1658a

I've made a number of aperture plates for this camera over the years, since it's played host to a number of improvised and adapted lenses, from industrial lenses, binocular lenses, Xerox machine lenses, etc. With this 250mm focal length meniscus lens, the 3, 6, 9, 17 and 34 millimeter aperture plates will effectively render f-stops of f/83, f/42, f/28, f/15 and f/7.4, respectively (at infinity focus); enough of a selection to permit a wide variety of exposure settings for virtually any kind of light. Of course, since the camera normally lacks any kind of mechanical shutter, exposures are made using a lens cap, implying that exposure times need to be long enough (at least 1 second) so as to be accurate and repeatable.

It's appropriate to mention that determining exposure for close-up settings requires the photographer to know the f-stop value corrected for the so-called bellows extension. Why this happens is that, as the camera is focused close-in, the focal length required to render the object in sharp relief gets longer and longer, limited by how long the camera will extend. Since the definition of an f-stop is focal length divided by aperture diameter, any given f-stop will be effectively a larger number when focused close-up as compared to infinity. On this camera, I have a distance scale on the side of the body that renders a readout of the focus distance (from lens to film plane) measured in millimeters, while each aperture plate is also indicated with its aperture diameter (also in millimeters), implying that, after focusing upon the subject and selecting the appropriate aperture plate, all I need do is read off the focus distance and divide it by the aperture diameter to arrive at the true f-stop value, corrected for bellows extension, making for more accurate exposures.

It is possible to use this method with any modern large format lens. First, take the lens's rated focal length and divide into it each of the major f-stop values on the lens. These numbers will be the effective diameters of each f-stop, in millimeters. Write them down on a laminated card for handy reference while out and about in the field. Also, take along with your large format camera kit a small measuring tape. I like to use the flexible kind, used for sewing. After setting up and focusing your camera upon the scene, measure the distance, along the side of the camera, from the middle of the lens to the film plane, then divide that by the diameter of your chosen f-stop (as indicated on your reference card). This will give you the actual f-stop value, corrected for bellows extension.

It is only appropriate, as photographic technology grows more sophisticated to the point of becoming ubiquitous, that one rediscovers the essential methodologies from the earliest days of the medium, employing the simplest of lenses and light recording media, because in the process you never know what magic might unfold, what mysteries there might be to unravel.

Post-Script: Though I prefer to display my thoughts in this blog via images of manual typewriter output, I thought it appropriate to break out the little-used Alphasmart Neo, upon which I wrote this piece, considering the Neo is now defunct, no longer in production, as are many of my other writing implements. Photos via Fujifilm X10.